

As the demand for sustainable energy solutions rises, many trailer owners are considering the installation of solar panels to harness the power of the sun. Installing solar panels on your trailer not only contributes to reducing your carbon footprint but also provides a reliable source of electricity for your adventures on the road. Whether you’re planning a weekend getaway or an extended journey, having a solar power system can enhance your overall experience.
This guide aims to walk you through the essential steps and considerations for successfully installing solar panels on your trailer. From selecting the right panel size and type to understanding the installation process, you will gain valuable insights into creating an efficient solar system tailored to your needs. Additionally, we will cover the necessary tools and materials, as well as safety measures to ensure your installation is both effective and secure.
With the right knowledge and preparation, transforming your trailer into a self-sufficient power hub can be a rewarding project. Join us as we explore the world of solar energy and empower your travels with the freedom of off-grid living.
Choosing the Right Solar Panel System for Your Trailer
Selecting an appropriate solar panel system for your trailer is crucial to ensuring you have a reliable power source during your travels. Start by assessing your power needs. Consider the devices you’ll be using, such as lights, refrigerators, or electronics, and calculate their total wattage. This will help you determine the size of the solar panel system required to meet your energy demands.
Next, evaluate the available roof space on your trailer. The size of the solar panels you can install is limited by this area, so measure carefully. Standard panels come in various sizes, and selecting ones that fit well within the available space will maximize efficiency. Additionally, ensure that the panels are lightweight, as this is important for maintaining stability during travel.
Consider the type of solar panel as well. Monocrystalline panels are generally more efficient and have a longer lifespan but can be more expensive. Polycrystalline panels are a cost-effective alternative, providing good performance at a lower price. Evaluate your budget and preferences to find the best fit for your trailer.
Finally, it is essential to factor in the solar charge controller and battery system. A quality charge controller will prevent battery overcharging and regulate power output efficiently. Choose deep-cycle batteries, which are designed for repetitive charging and discharging, ensuring your power system remains robust over time.
Step-by-Step Installation Process for Solar Panels
Installing solar panels on your trailer involves several important steps to ensure optimal performance and power generation. Follow this guide to successfully complete the installation process.
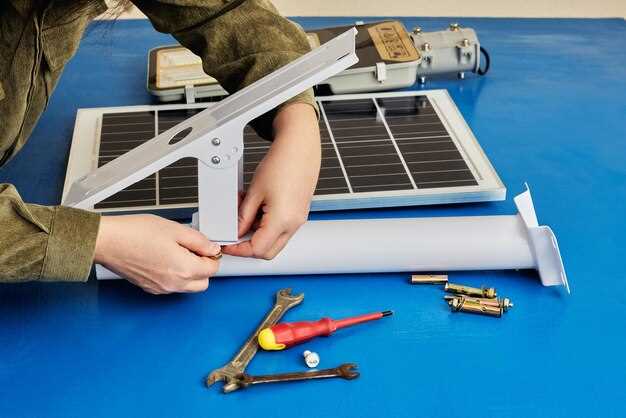
Step 1: Gather Necessary Materials
Begin by collecting all the materials needed for the installation. This includes solar panels, mounting brackets, charge controller, batteries, wiring, and tools such as a drill, screwdriver, and cable cutters. Ensure that your solar system is compatible with your trailer’s power requirements.
Step 2: Choose the Right Location
Select an optimal location on your trailer’s roof for the solar panels. This area should receive maximum sunlight exposure without any obstructions like vents or air conditioning units. Using a measuring tape, determine the space available and ensure it can accommodate the solar panel layout.
Step 3: Install Mounting Brackets
Secure the mounting brackets to the trailer’s roof using the drill. Make sure that they are positioned correctly to support the solar panels. It is advisable to apply sealant around the screws to prevent water leaks. Allow the sealant to dry completely before proceeding.
Step 4: Attach Solar Panels
Carefully place the solar panels onto the installed brackets. Use the provided hardware to securely fasten them in place. Check for tightness and stability to prevent movement during travel.
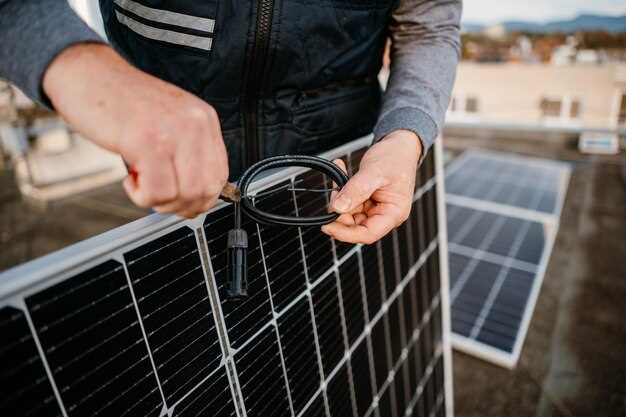
Step 5: Wiring the System
Connect the wiring from the solar panels to the charge controller. Follow the manufacturer’s instructions to ensure correct polarity and secure connections. This step is crucial to safely transfer power generated by the panels to the batteries.
Step 6: Connect to the Battery
Once the charge controller is installed and wired correctly, connect it to the battery bank. This will allow the power generated by the solar panels to recharge the batteries, providing energy for your trailer’s needs.
Step 7: Test the System
After all connections have been made, it is essential to test the entire solar power system. Check the voltage levels and ensure that the solar panels are effectively charging the batteries. Monitor the performance for at least a few days to confirm that everything is functioning as intended.
Step 8: Maintenance
Regular maintenance is important for the longevity of your solar power system. Clean the solar panels periodically to remove dirt and debris, and inspect the wiring for any signs of wear. Keeping your system well-maintained ensures consistent power supply for your trailer.
Connecting Solar Panels to Your Trailer’s Power System
To successfully integrate solar panels into your trailer’s power system, it is essential to begin by evaluating your energy requirements. This assessment will help determine the number of solar panels needed, ensuring that they can effectively meet your power demand.
The next step involves mounting the solar panels securely on the roof of your trailer. Use brackets or mounting hardware to prevent movement during travel. Position the panels to maximize sun exposure throughout the day; a tilt can enhance efficiency, especially in regions with varying sun angles.
Once the panels are installed, you will need to connect them to a charge controller. This device regulates the voltage and current coming from the solar panels, ensuring that your battery system charges safely and efficiently. Choose a charge controller compatible with both your solar panel output and battery specifications.
Next, connect the charge controller to your battery bank. Properly connecting the positive and negative terminals is crucial to avoid damage to your power system. After the connection setup, use appropriate cables rated for the power you plan to utilize. Thicker cables reduce voltage drop and enhance the system’s efficiency.
Finally, integrate your battery bank with the trailer’s power system. This can be accomplished by connecting the batteries to your trailer’s inverter, which converts stored energy into usable AC power. Ensure the inverter meets the peak load requirements of your appliances.
Once everything is connected, monitor the system to ensure it operates correctly. It is advised to regularly check connections and battery health to maintain optimal performance of your solar power setup.


