

When it comes to DIY projects, few can be as rewarding as giving your trailer a fresh, beautiful paint job. Not only does a well-executed paint job enhance the visual appeal of your trailer, but it also protects its surface from the elements, extending its lifespan. Mastering painting techniques can elevate your DIY skills and transform your trailer into a stunning work of art.
In this article, we will explore essential painting techniques that can take your trailer from dull to dazzling. From selecting the right type of paint to understanding proper application methods, we will cover all the necessary steps to ensure your project yields the best results. Whether you are a beginner or an experienced DIY enthusiast, these tips will help you achieve a professional-looking finish.
Join us as we delve into the world of trailer painting. We’ll discuss tools, materials, and techniques that will make your painting project not just a task but an enjoyable and fulfilling experience. Get ready to unleash your creativity and set your trailer apart with stunning, eye-catching results!
Choosing the Right Paint and Materials for Your Trailer
When embarking on a DIY trailer painting project, selecting the right paint and materials is crucial for achieving stunning results. The first step is to consider the type of paint that will best suit your trailer’s surface and intended use. Common options include acrylic, enamel, and polyurethane paints. Acrylic paints are water-based, making them easy to clean, while enamel paints offer durability and a glossy finish. Polyurethane paints provide the highest level of protection against the elements.
Next, assess the surface material of your trailer. If your trailer is made of metal, a rust-inhibiting primer is essential to prevent corrosion. For fiberglass or plastic surfaces, specialized paints designed for these materials will ensure optimal adhesion. Always choose high-quality primers and paints that offer UV protection to safeguard against fading and deterioration over time.
Tools play a significant role in the painting process. A good-quality roller or paint sprayer can help you achieve a smooth finish, while brushes can be used for touch-ups and detailed areas. Additionally, consider using painter’s tape to protect edges and achieve clean lines. Don’t forget to include safety equipment such as gloves and masks, especially when working with spray paints.
Ultimately, investing in the right paint and materials will not only enhance the appearance of your trailer but also ensure its longevity and durability. Research and choose wisely to create a finish that you can be proud of for years to come.
Step-by-Step Guide to Preparing Your Trailer for Painting
Preparing your trailer for painting is a crucial step in achieving a professional-looking finish. Proper preparation ensures that the paint adheres well and lasts for years. Follow these steps to get your trailer ready for a stunning DIY painting project.
Step 1: Gather the Necessary Tools and Materials
Before starting, collect all required tools such as sandpaper, paint remover, cleaner, a paint sprayer or brushes, masking tape, and protective gear like gloves and goggles. Choose high-quality paint suitable for trailers.
Step 2: Clean the Trailer Thoroughly
Begin by thoroughly cleaning the trailer. Remove dirt, grease, and old paint using a pressure washer or a strong cleaner. Make sure to rinse well and let the trailer dry completely before proceeding. This step is essential for ensuring good paint adhesion.
Step 3: Remove Hardware and Accessories
Take off any hardware and accessories from the trailer, such as lights, straps, and other fixtures. This will make the painting process easier and help you achieve a clean and uniform finish. Store these items securely to avoid losing them.
Step 4: Sand the Surface
Using sandpaper or a sanding block, sand the entire surface of the trailer. Focus on areas with rust or old paint. Sanding creates a rough surface that helps the new paint adhere better. Make sure to wear a mask to avoid inhaling dust particles.
Step 5: Repair Any Damages
Inspect the trailer for any dents, scratches, or rust spots. Use a filler to repair dents and sand the filled areas smooth once dry. For rust spots, apply a rust-inhibiting primer to prevent further corrosion.
Step 6: Mask Off Areas
Use masking tape to cover windows, tires, and any areas you don’t want to paint. Ensure that the edges of the tape are pressed down firmly to prevent paint from seeping underneath.
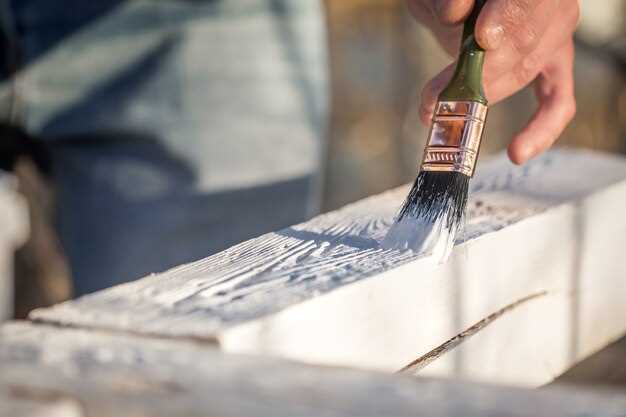
Step 7: Apply Primer
Applying a primer is vital for the paint’s durability and adhesion. Choose a primer designed for metal surfaces. Apply it evenly using a sprayer or brush, and allow it to dry completely according to the manufacturer’s instructions.
Step 8: Prepare for Painting
Once the primer is dry, inspect the surface for imperfections and make any necessary touch-ups. Gently sand the primed surface if required for optimal paint adhesion, then wipe it down with a clean cloth to remove any dust.
Following these steps will set a solid foundation for your trailer painting project, allowing you to achieve stunning results. Happy painting!
Finishing Techniques That Enhance Durability and Aesthetics
When it comes to DIY painting projects, including trailer painting, finishing techniques play a crucial role in both the durability and aesthetic appeal of the final result. By employing effective methods, you can ensure your paint job not only looks stunning but also withstands the elements over time.
1. Surface Preparation: Proper surface preparation is fundamental. Begin by cleaning the surface thoroughly, removing any dirt, grease, or rust. Sand the area to create a smooth base for the paint to adhere effectively. This not only enhances adhesion but also contributes to a more polished appearance.
2. Primer Application: The use of a high-quality primer is essential. Primers create a barrier that improves paint adhesion, prevents peeling, and promotes a more vibrant finish. Choose a primer specifically designed for the type of surface you are painting, whether metal, wood, or fiberglass.
3. Choosing the Right Paint: Selecting the appropriate paint is vital for durability. Opt for high-quality, weather-resistant paints formulated for trailers or outdoor use. These paints typically contain additives that enhance UV protection and resist fading and chipping.
4. Topcoats for Protection: Applying a topcoat significantly boosts the longevity of your paint job. Clear coats or protective sealants not only enhance the visual depth of the color but also provide an additional layer of defense against scratches, stains, and harsh weather conditions.
5. Regular Maintenance: After completing your DIY painting, regular maintenance is crucial to prolonging the life of your finish. Periodically wash the surface with mild soap and restore protective coatings as necessary. This will keep your trailer looking fresh and new for years to come.
By integrating these finishing techniques into your painting process, you can achieve remarkable results that combine both beauty and durability, ensuring your trailer remains an eye-catching asset on the road.


