

Ensuring the safety of your trailer while on the road is paramount, and a critical part of this is the functionality of electrical components, particularly the lights. Properly functioning trailer lights not only keep you safe but also keep other road users informed of your movements. Therefore, regular inspection of your trailer lights and wiring is essential to avoid mishaps and ensure compliance with local regulations.
Electrical systems in trailers can be complex, as they involve various components that work together to provide illumination and signals to other drivers. Understanding how to inspect these systems comprehensively is vital. This guide will lead you through the necessary steps to conduct an effective inspection, helping you identify issues before they become significant problems. By focusing on your trailer lights and how they connect through the wiring, you can ensure both safety and functionality.
Whether you’re a seasoned traveler or new to towing, a proactive approach to inspecting your trailer’s electrical system will enhance your overall experience on the road. From understanding the types of lights to knowing how to troubleshoot wiring issues, this guide offers the insights needed for proper maintenance of your trailer’s lighting system.
Steps for Checking Trailer Light Functionality
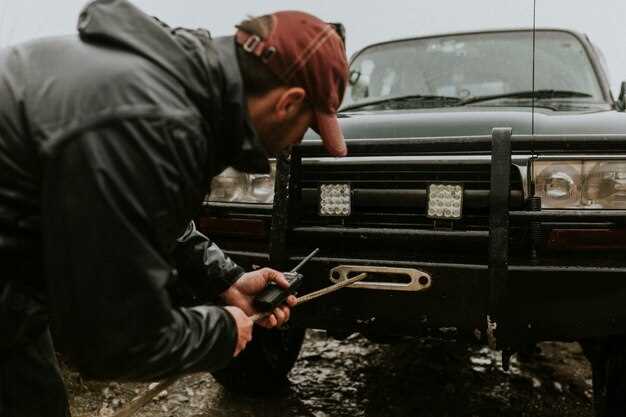
To ensure your trailer lights are functioning correctly, start by examining the electrical connections. Disconnect the trailer from the towing vehicle and inspect the wiring harness for any visible wear or damage. Look for frayed wires, corrosion, or loose connections that could impede electrical flow.
Next, check the lights themselves. Activate the brakes and turn signals on the towing vehicle while someone observes the trailer lights. Each function – brake lights, turn signals, and running lights – should be tested individually. If any lights do not illuminate as expected, it may indicate a burnt-out bulb or a connection issue.
If the lights appear dim, inspect the bulb sockets for corrosion. Clean any affected areas to restore proper electrical continuity. Additionally, verify that the bulbs are securely seated in their sockets and replace any that show signs of damage.
Another key step is to check the ground connection. Ensure the ground wire is securely fastened to a clean, bare metal surface on the trailer. A poor ground can result in intermittent lighting issues, so this is critical for reliable light performance.
Lastly, connect the trailer to the towing vehicle and perform a final test of all lights. If any issues persist after these checks, consulting a professional may be necessary to diagnose deeper electrical problems.
Identifying Common Wiring Issues in Trailers
When it comes to trailer maintenance, checking the electrical system is crucial for safety and functionality. Several common wiring issues can lead to malfunctioning lights or even complete failure of the trailer’s electrical system.
One prevalent issue is corroded connections. Over time, moisture can seep into electrical connectors, leading to rust and poor conductivity. To identify this problem, visually inspect connectors for any signs of corrosion or rust. Cleaning these connections can often restore functionality.
Another common issue is damaged wiring insulation. Fraying or wear in the outer insulation can expose the inner wires, resulting in short circuits. Check the wiring along the trailer for any visible damage or cuts. If you notice exposed wires, replacement of the affected sections is necessary to prevent electrical failures.
Poor grounding is also a frequent cause of lighting problems. A weak ground connection can lead to flickering or non-functional lights. Check the ground connections between the trailer and tow vehicle, ensuring they are clean and securely attached. Proper grounding is essential for the electrical system to work effectively.
Loose connections can create intermittent electrical issues. Ensure all wiring connections are tight and secure. A shake or jolt during travel can loosen connections, leading to inconsistent performance. Regularly checking these connections can help maintain a reliable electrical system.
Lastly, check for incorrect wiring configurations. If lights aren’t functioning as intended, refer to the wiring diagram for your specific trailer model. Miswired connections can cause lights to operate unpredictably, which is not only inconvenient but also hazardous on the road.
Tools Needed for Electrical Testing of Trailer Lights
To effectively check the electrical system of trailer lights, you will need a specific set of tools designed for testing and diagnostics. Having the right equipment will help you identify issues quickly and accurately.
- Multimeter: This versatile device is essential for measuring voltage, current, and resistance in the electrical wiring of your trailer. It allows you to troubleshoot various electrical problems by checking for continuity and verifying that power is reaching each light.
- Test Light: A simple yet effective tool, the test light helps you check for voltage in the wiring. It provides a quick visual indication if there’s power flowing through a specific wire or terminal.
- Wire Strippers: Use wire strippers to remove insulation from electrical wires without damaging the conductors beneath. This tool is helpful when you need to make repairs or connections.
- Crimping Tool: This tool is necessary for securely connecting wires with crimp connectors. A solid connection ensures that electrical signals are transmitted effectively throughout the trailer lighting system.
- Electrical Tape: Ideal for insulating and protecting exposed wires and connections, electrical tape helps prevent short circuits and corrosion.
- Wire Cutter: A wire cutter is used for trimming excess wire lengths and for cutting through damaged wiring in need of replacement.
- Voltage Tester: This handy tool allows you to check whether there is voltage present in the electrical system and can help pinpoint malfunctioning components.
Having these tools on hand will enable you to perform thorough inspections of your trailer lights and wiring, ensuring they function correctly and safely during your travels.


